Using the student course planner
Last updated: April 30, 2026
Plan a student's courses across multiple school years on their profile — and quickly enroll them into their planned courses when the term starts.
Overview
The student course planner lets counselors and administrators map out which courses a student should take in each year and term, working toward graduation requirements. You can apply district-wide course plan templates, manually add or remove courses, track progress against graduation paths, and now bulk-enroll the student into their planned courses for a term — all from the student's profile.
This guide covers:
Opening the course planner
Creating a plan for a student
Applying an admin course plan template
Adding or removing courses manually
Reading the credit summary and graduation progress
Enrolling a student into their planned courses
Opening the course planner
Open a student's profile
Click the Courses tab
Click Graduation to see the graduation plan
Creating a plan for a student
If the student doesn't already have a course plan, click Plan courses. Scout automatically creates a plan based on the student's school enrollment history — no manual setup needed.
Note: The plan starts from the earliest school year the student was enrolled. This anchors the plan timeline to their actual academic history.
Applying a course plan template
Course plan templates are pre-built course sequences (e.g., "4-year college prep track") that administrators create at the district level. Applying a template fills the student's plan with the recommended courses.
In the planner, click the Apply plan dropdown
Select an admin plan from the list
Review the preview showing which courses will be added and where
Click Apply to confirm
Scout is smart about applying plans:
Courses the student has already completed are skipped
Courses scheduled for past terms are skipped
Courses are mapped to the right year based on the student's current grade level
To remove a previously applied plan, click the chip showing the plan name and select Remove plan. This deletes the courses that came from that template (manually added courses are preserved).
Adding or removing courses manually
Adding a course
Find the year and term where you want to add the course
Click Add course
Search and filter the course catalog by name, subject, grade level, or category
Click a course to add it (or select multiple and click Add N courses)
Removing a course
Hover over a course card and click the X to remove it from the plan.
Moving a course
Drag and drop a course card to a different year or term to reschedule it.
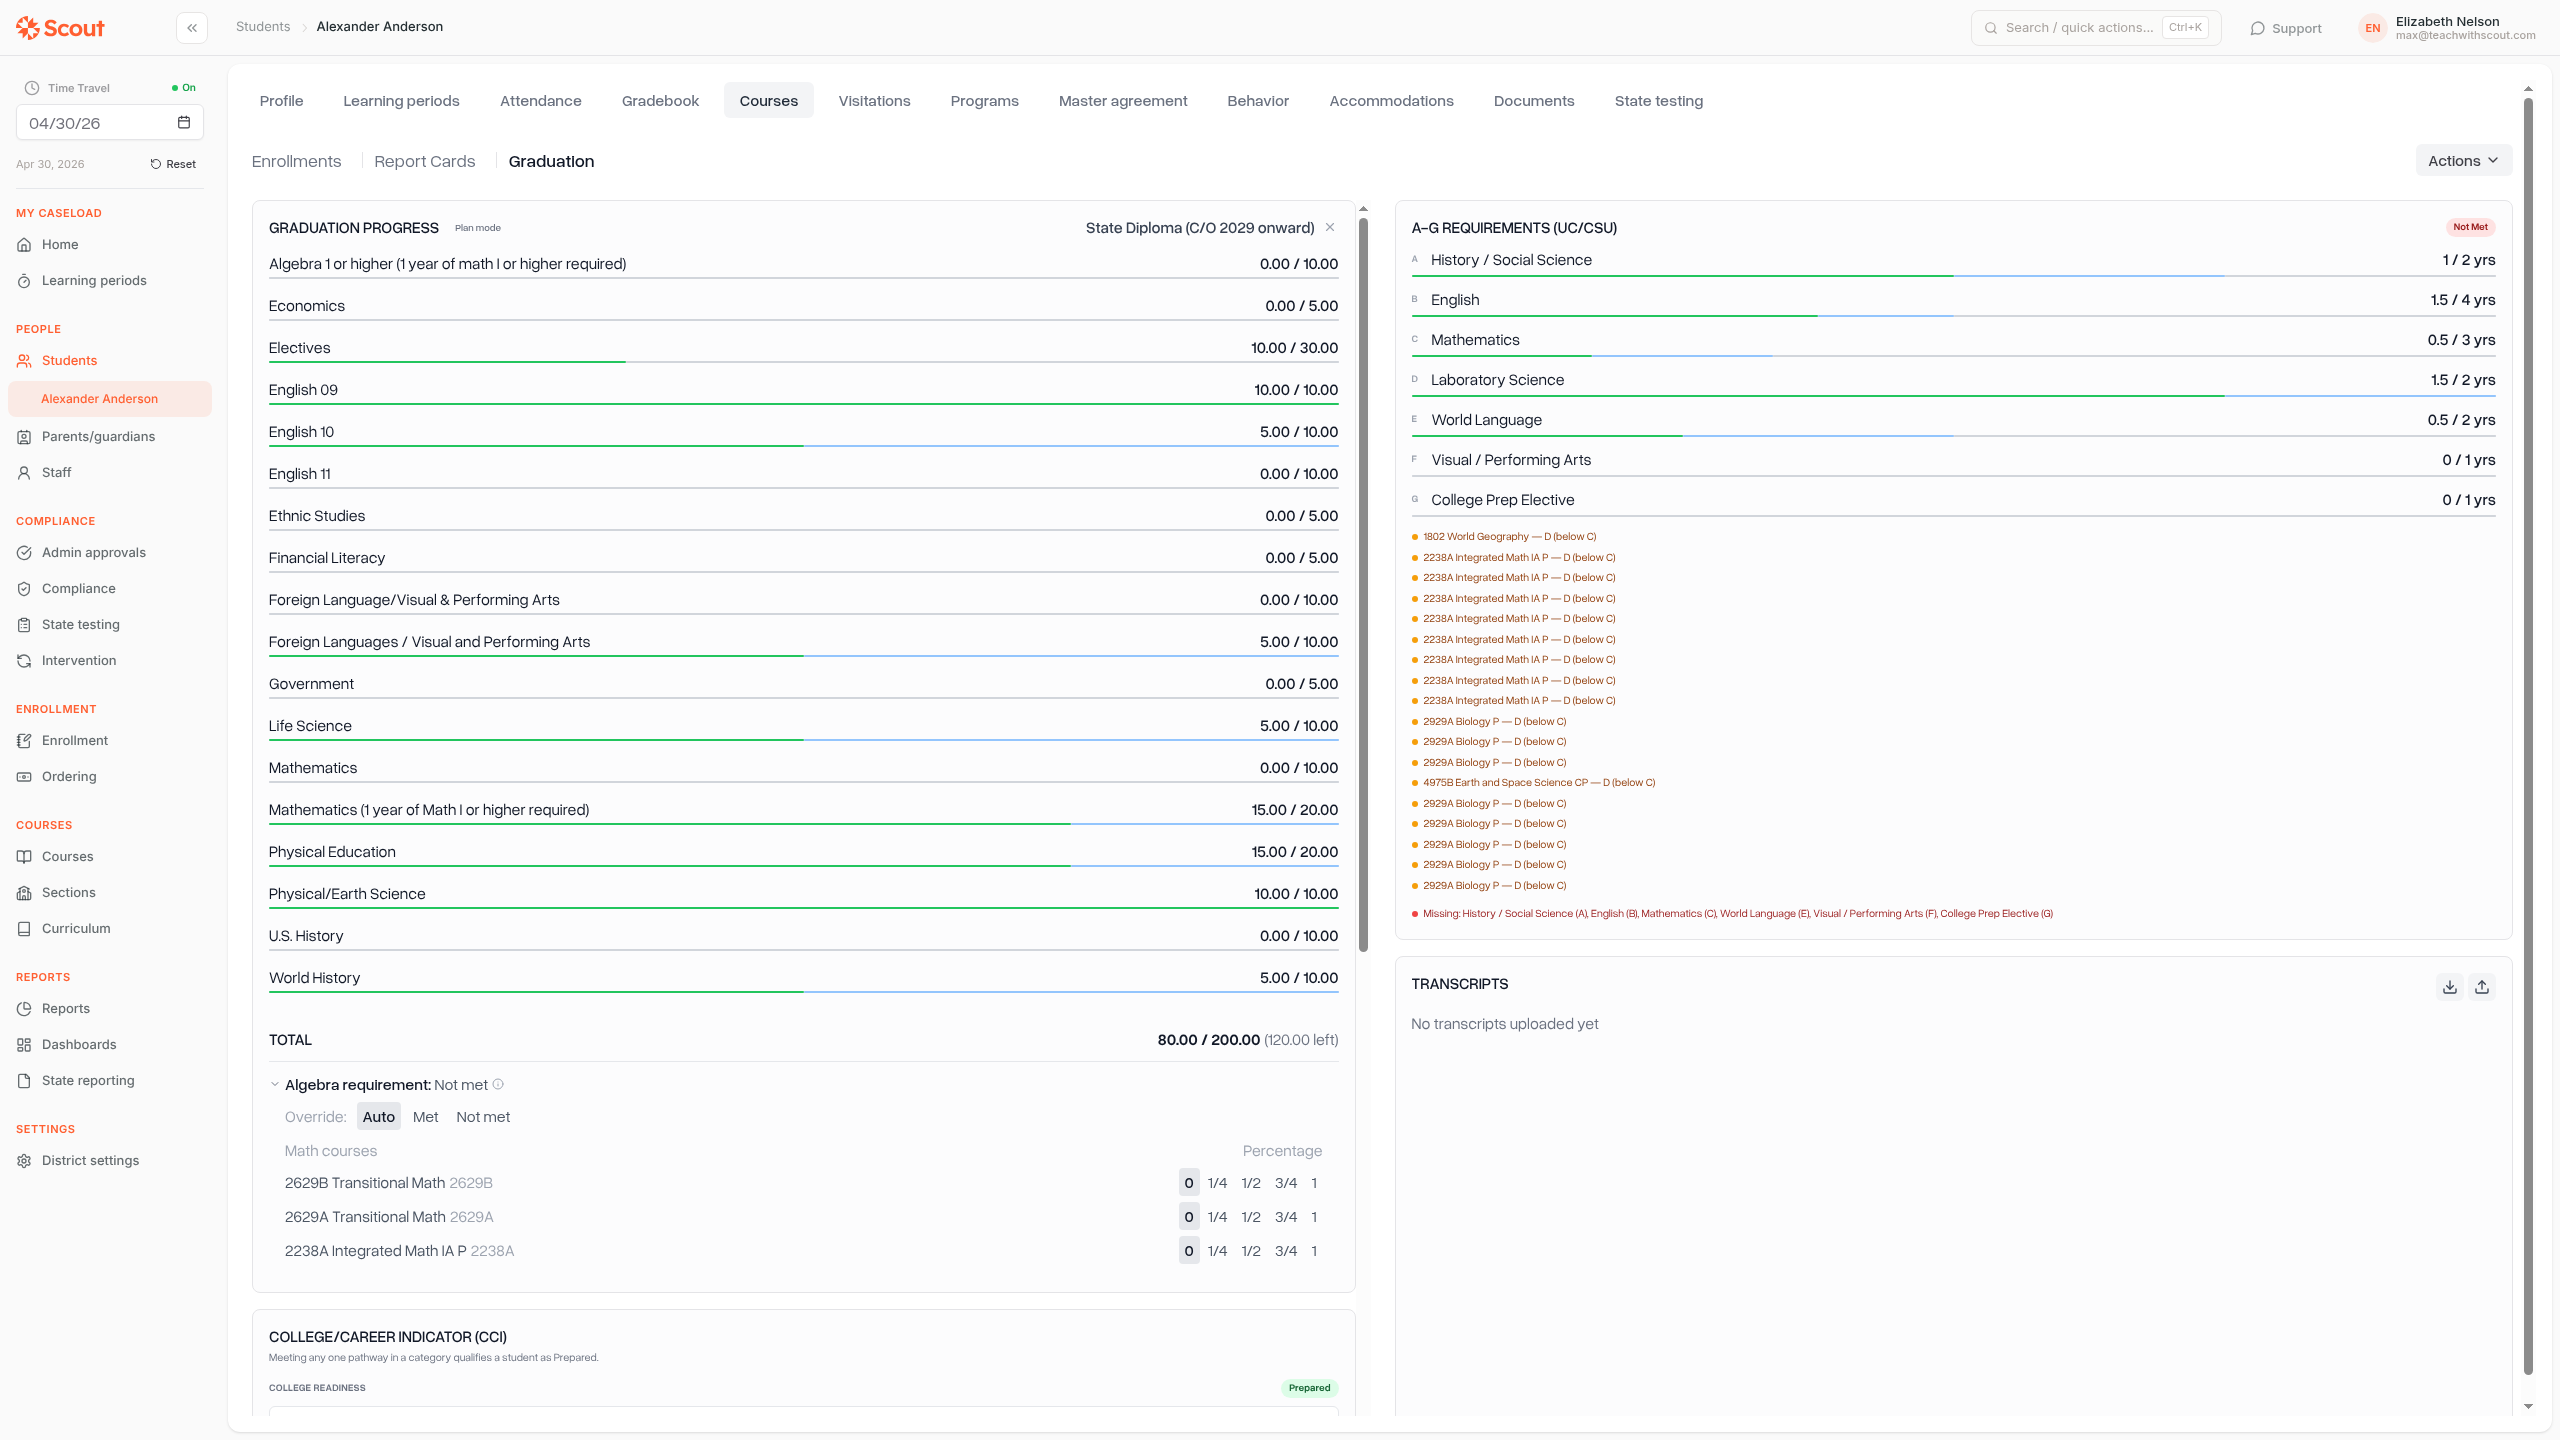
Credit summary and graduation progress
The right side of the planner shows a Credit summary with progress against each graduation requirement category (e.g., Math, English, Science).
Each category shows:
Completed credits — courses the student has finished
In progress credits — courses the student is currently taking
Planned credits — courses scheduled in the planner but not yet started
Deficit — credits still needed to meet the requirement
No graduation path?
If the student doesn't have an assigned graduation path, the credit summary still shows total credits earned by category. Use the dropdown above the summary to assign a graduation path so requirements appear.
Enrolling a student into their planned courses
Once a student's graduation plan has courses mapped to a specific term, you can bulk-enroll them into matching sections directly from the Enrollments view — without looking up each course individually. You can also enroll students directly from their courses tab:
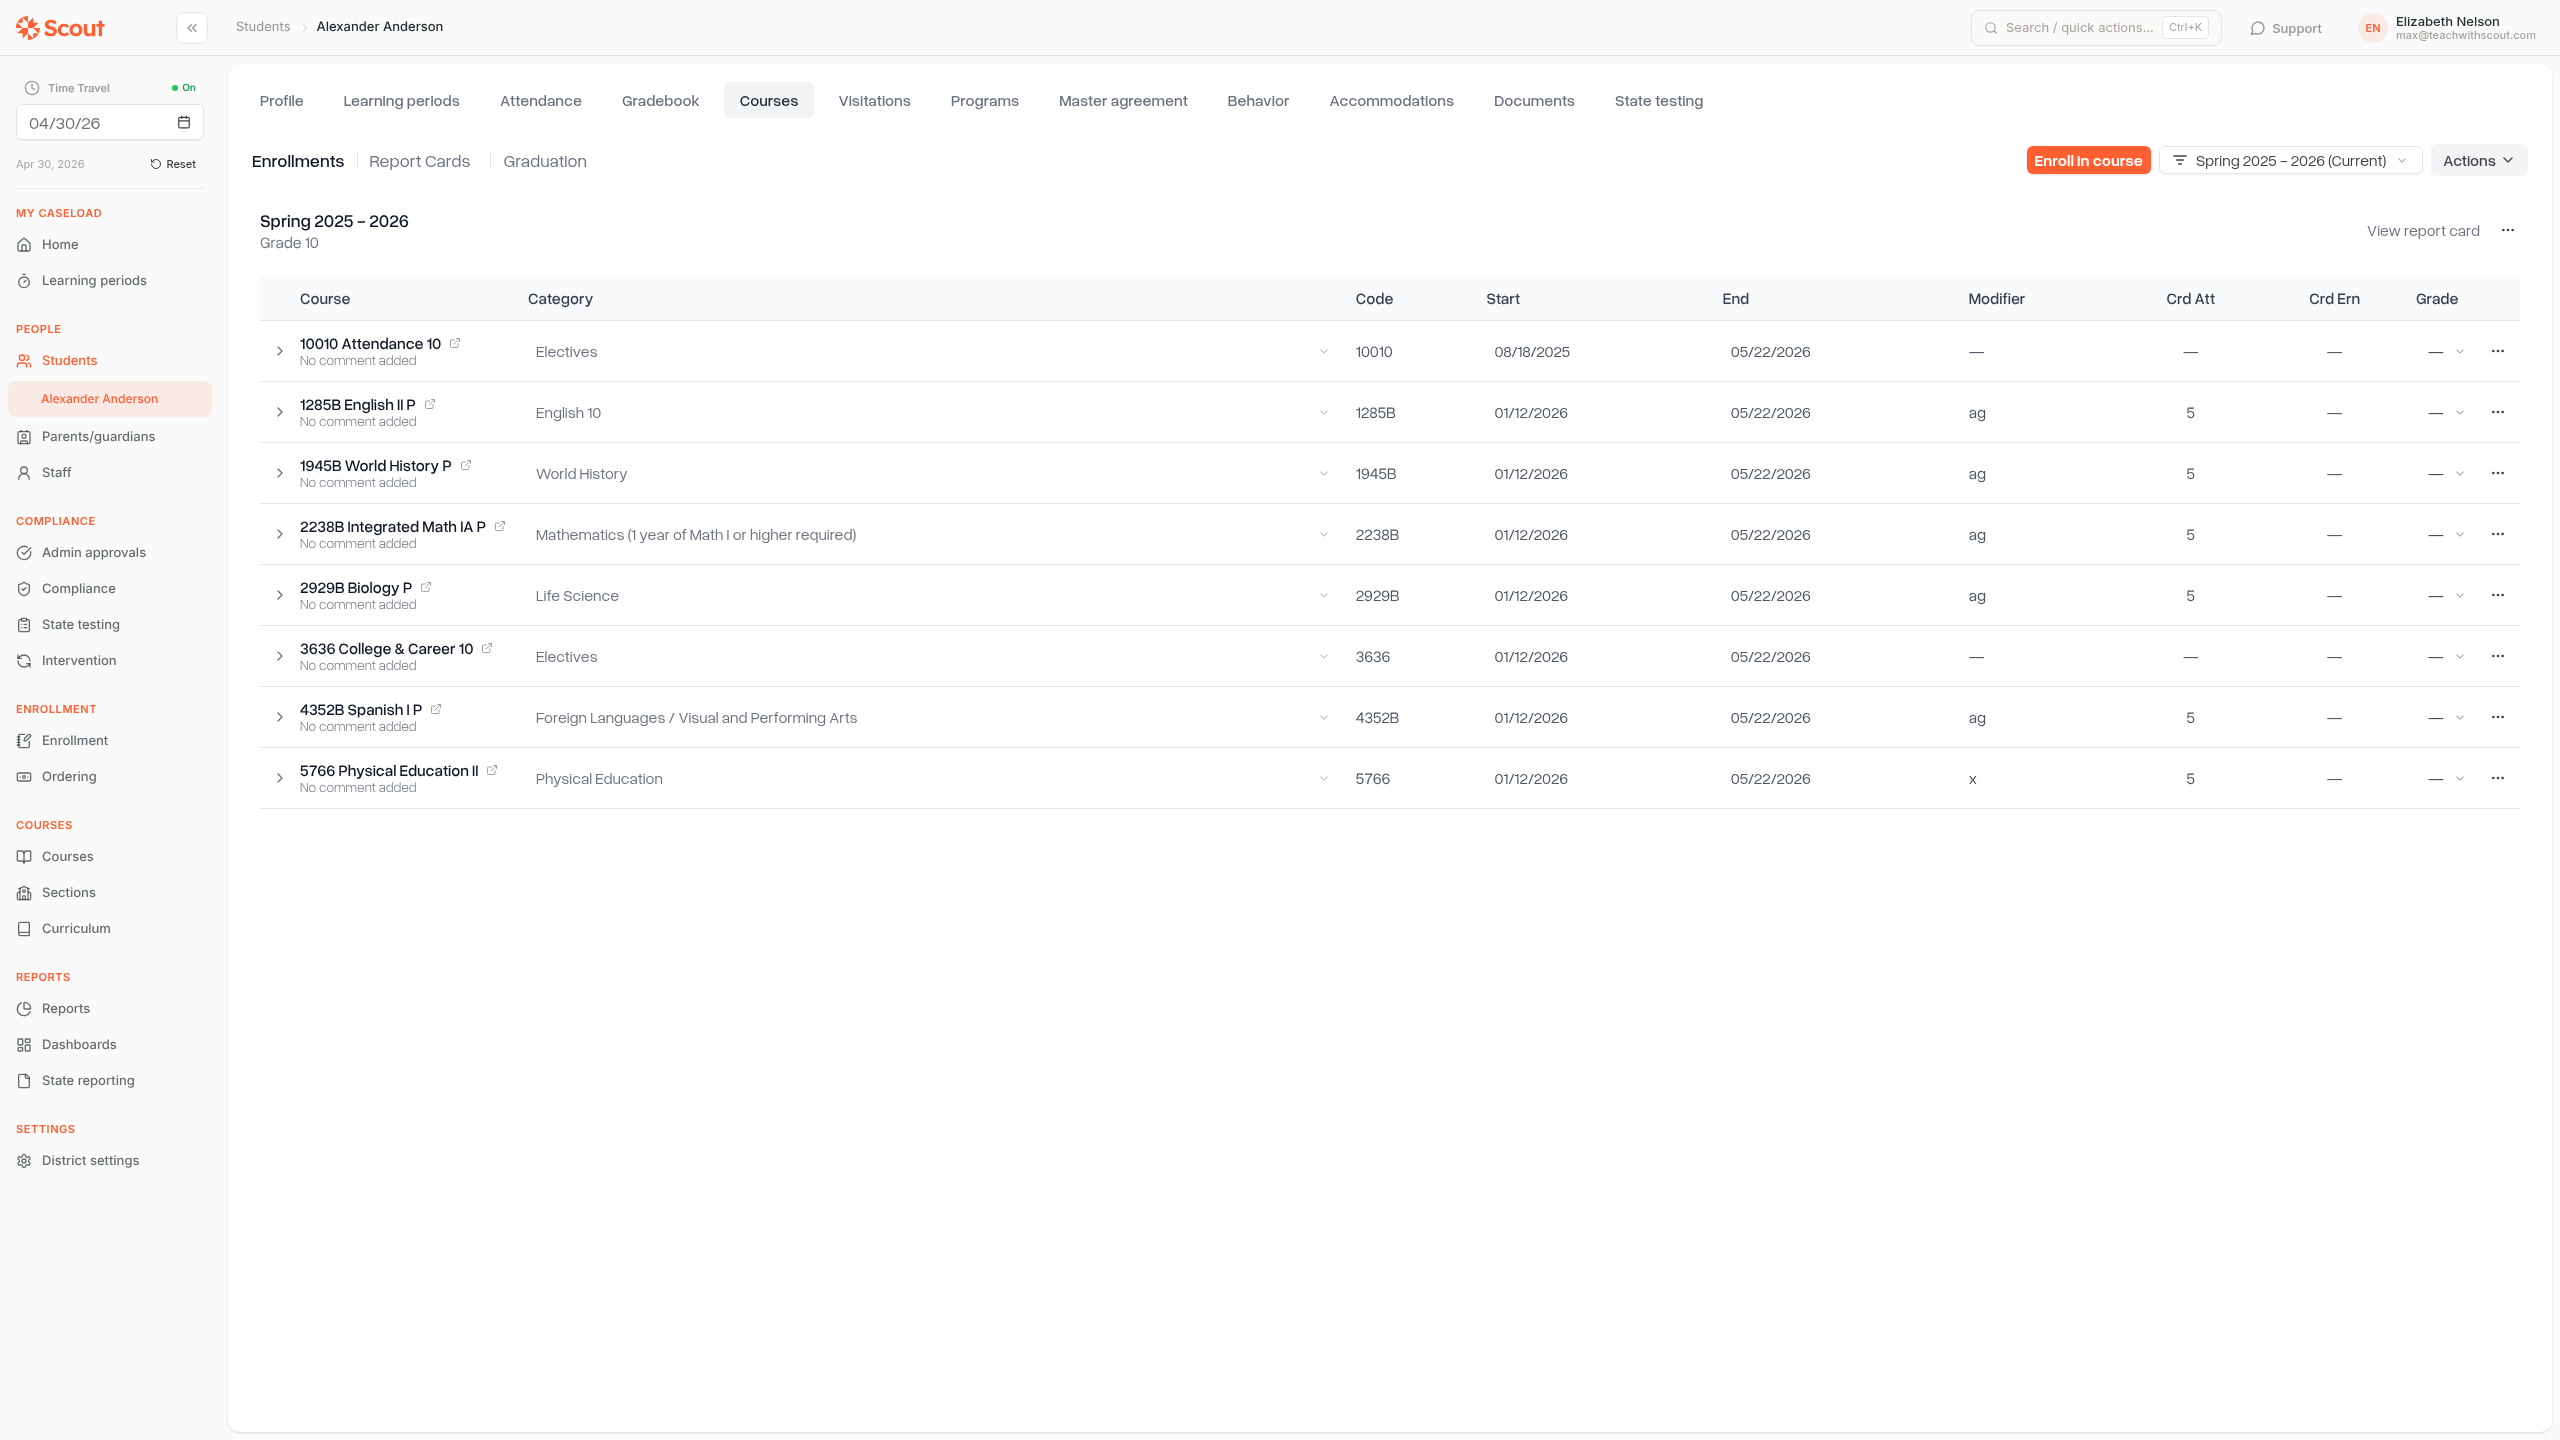
Open the student's profile and click the Courses tab
Make sure the Enrollments sub-view is active (the default)
In the term dropdown, select a specific term — for example, "Fall 2025–2026" — rather than "All terms"
Click Enroll from plan (next to the Enroll in course button)
A dialog opens showing every course planned for that term. For each course, Scout automatically fetches matching sections and pre-selects any single-section matches
Review and adjust the section dropdown for each course as needed. Check Create a new independent study section for this student if you'd prefer a standalone section instead of an existing one
Optionally adjust the enrollment start and end dates — they default to the term's dates
Click Enroll N sections to submit. Scout enrolls the student in all selected sections at once and displays a results summary
What the dialog tells you
Already enrolled — if the student is already in a section for a given course, that row is automatically unchecked and shows a badge. No duplicate enrollment is created.
No sections available — if no sections exist for a planned course in the selected term, the "Create a new independent study section" checkbox is checked automatically. You can uncheck it to skip that course entirely.
Eligibility warnings — if a selected section has a school or learning center mismatch, or is at capacity, a red note explains the issue so you can pick a different section or opt for an independent study instead.
When is Enroll from plan greyed out? The button is disabled when: "All terms" is selected instead of a specific term, the student has no graduation plan, or there are no planned courses for the selected term. Hover over the button to see the exact reason.
After enrolling
A results summary appears listing every planned course and its outcome — enrolled, independent study section created, already enrolled, or skipped. The enrollment table refreshes automatically so you can see the new enrollments right away.
Tips
Past terms are read-only — you can see what was taken but can't add or remove courses there
Multi-select in the course picker lets you add several courses to the same term at once
The planner respects terms per year from your school's setup — semesters, trimesters, or quarters all work
Enroll from plan is the fastest way to move a student's whole planned schedule into active sections at the start of a new term
Permissions
The course planner and Enroll from plan are available to:
District admins
School admins
Counselors