Creating a grading scale and applying it to classes
Last updated: November 6, 2026
A grading scale turns a gradebook percentage into a grade, like A–F or 1–4. Each class uses the grading scale set on its gradebook. That scale decides the grades teachers can pick on report cards, and how Fill from gradebook converts percentages. A class with no grading scale shows the standard A+ to F list.
Only district administrators can create grading scales.
Step 1: Create the grading scale
In the sidebar, click District settings.
Under Grades, click Grading Scales.
Click Add grading scale.
In Scale Name, type a name teachers will recognize, for example "1–4".
Click Add Grade once for each grade on your scale.
For each grade, enter:
Grade: what appears on the report card, for example "4".
MIN %: the lowest gradebook percentage that earns this grade.
Click Create.
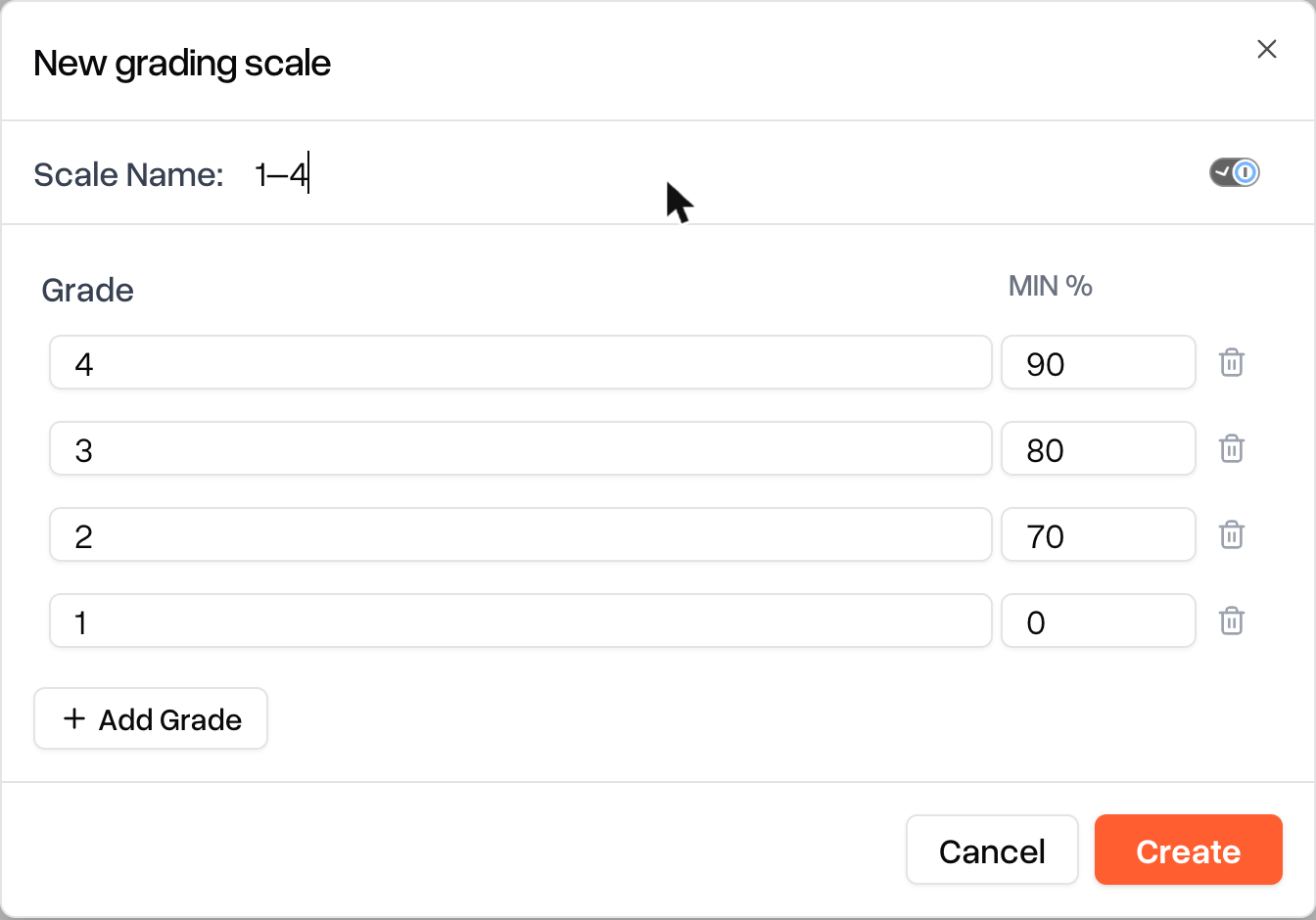
Here's an example 1–4 scale. Use your district's own cutoffs.
Grade | MIN % |
|---|---|
4 | 90 |
3 | 80 |
2 | 70 |
1 | 0 |
Set the lowest grade's MIN % to 0 so every percentage gets a grade. Each grade name has to be different.
If your district uses letter grades, you can skip building a scale by hand. Under Suggested, click add next to Standard A-F or A-F with +/-.
Step 2: Apply the scale to classes
A new grading scale isn't used anywhere until you attach it to a class's gradebook. You can do one class at a time or several at once.
One class
In the sidebar, click Sections and open the class.
Click the Assignments tab.
Click Configure gradebook.
Under Grading scale, choose your scale.
Click Save configuration.
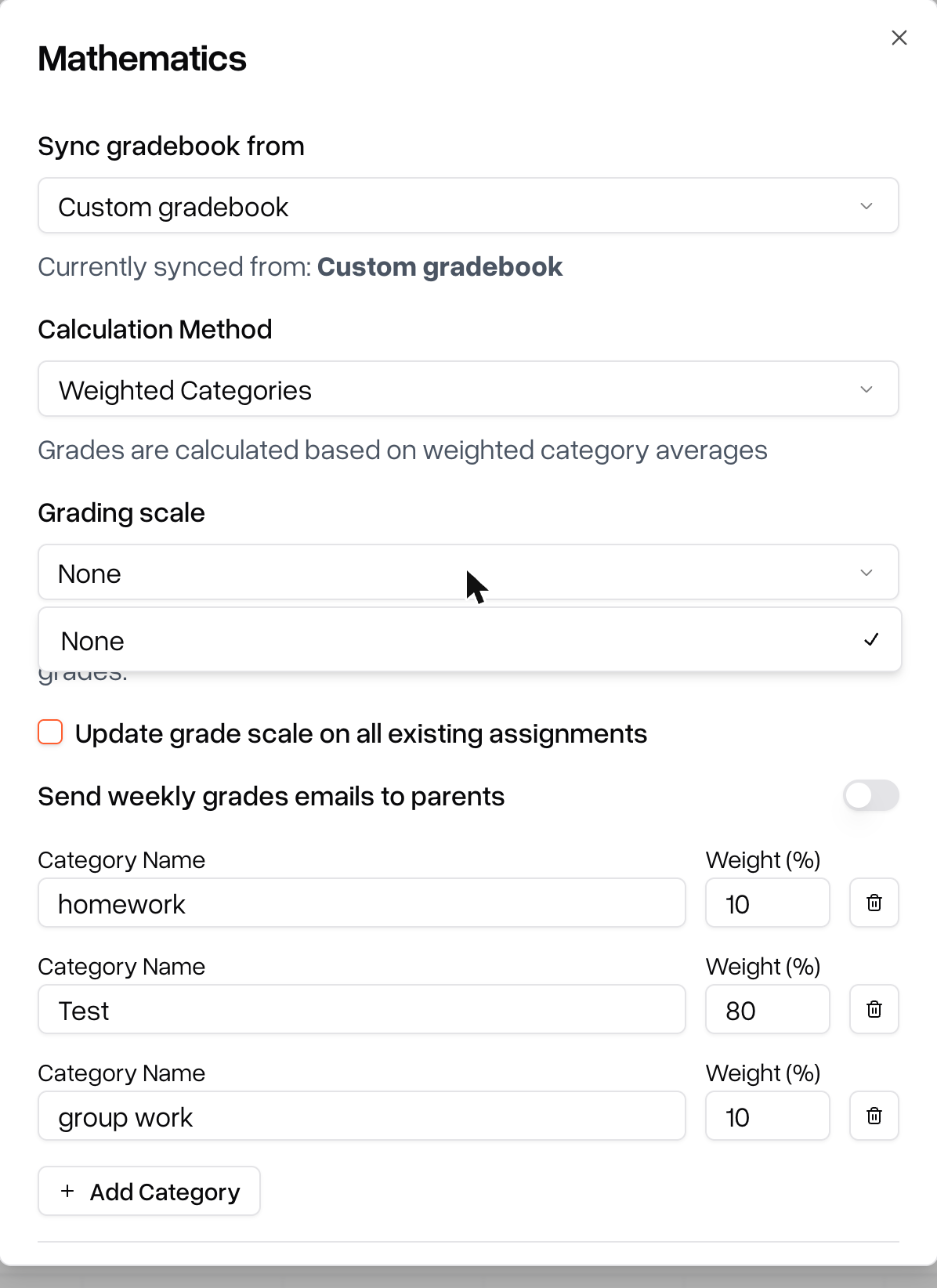
This only changes the grading scale. The class keeps its other gradebook settings, like categories and weights.
Several classes at once
In the sidebar, click Sections.
Click the list icon in the top right to switch to the table view.
Check the box next to each class you want to change.
Click Configure Gradebook in the bar that appears.
Under Grading scale, choose your scale.
Click Configure [number] sections.
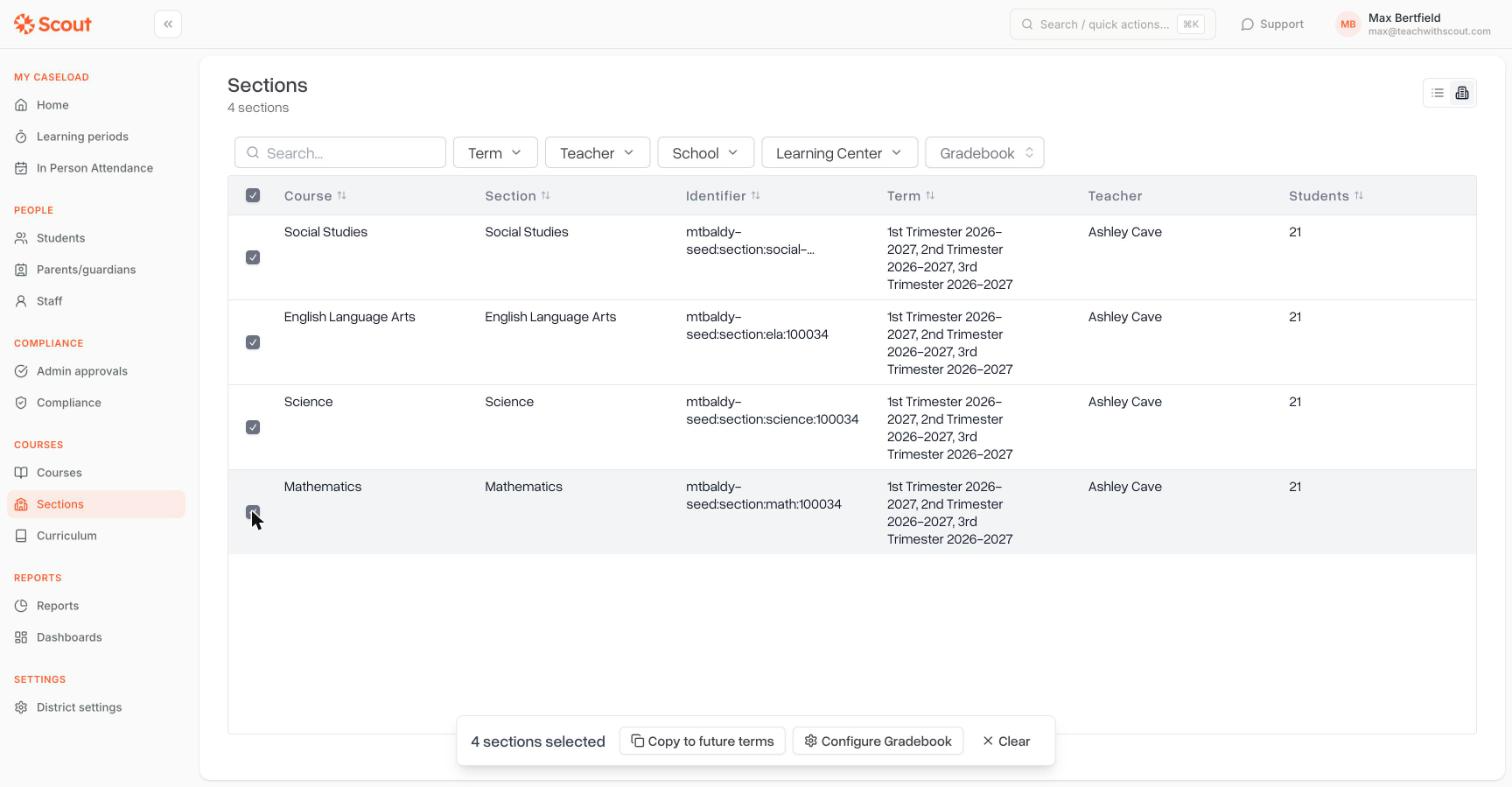
Important: this replaces each selected class's whole gradebook setup, not only the grading scale. That includes the gradebook type, calculation method, categories and weights. If a class already has categories or weights set up, re-enter them in this window, or change that class on its own using the steps above.
Use a scale for new classes automatically
On the Grading Scales page, turn on the Default switch next to a scale. New classes created in Scout after that will use it. Classes that already exist don't change, so apply the scale to them using Step 2.
What changes after you apply a scale
The Grade dropdown on report cards and progress reports shows the grades from your scale instead of A–F.
Fill from gradebook on a report card converts each class's gradebook percentage to a grade using your MIN % values.
The Report card grades tab on a class uses the same grade list.
Common questions
I made a 1–4 scale, but report cards still show A–F.
The scale hasn't been applied to that class's gradebook yet. Follow Step 2 for the class.
What happens to grades already entered with the old scale?
They stay as they are. The report card keeps showing the old grade until someone picks a new one from the dropdown.
Can I change a scale's cutoffs later?
Yes. On the Grading Scales page, click the pencil icon next to the scale, make your changes and click Update.
I don't see Grading Scales in District settings.
Only district administrators can open District settings. Ask your district administrator to create the scale.